Volumes are a great way to separate data from your virtual machine. Think of a volume as the cloud equivalent to a USB hard drive you that can plug into your laptop, then detach and take to a different laptop.
This topic serves as notes for how I got volumes to work with my Nebula instances. I’ll assume you’ve already got Nebula access and have your instance setup. See K-T’s recipe for one way to do this. SQuaRE is working on alternative workflows too; stay tuned.
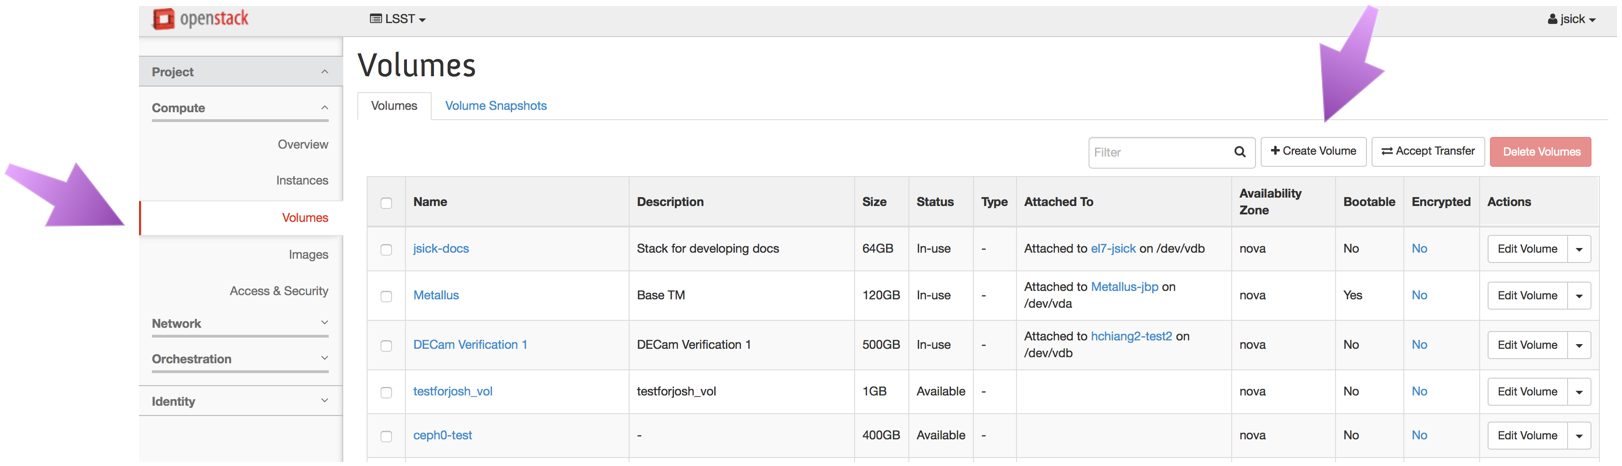
Step 1. Create the volume on the Nebula dashboard.
Go to https://nebula.ncsa.illinois.edu/dashboard/project/volumes/ and click on the Create Volume button.
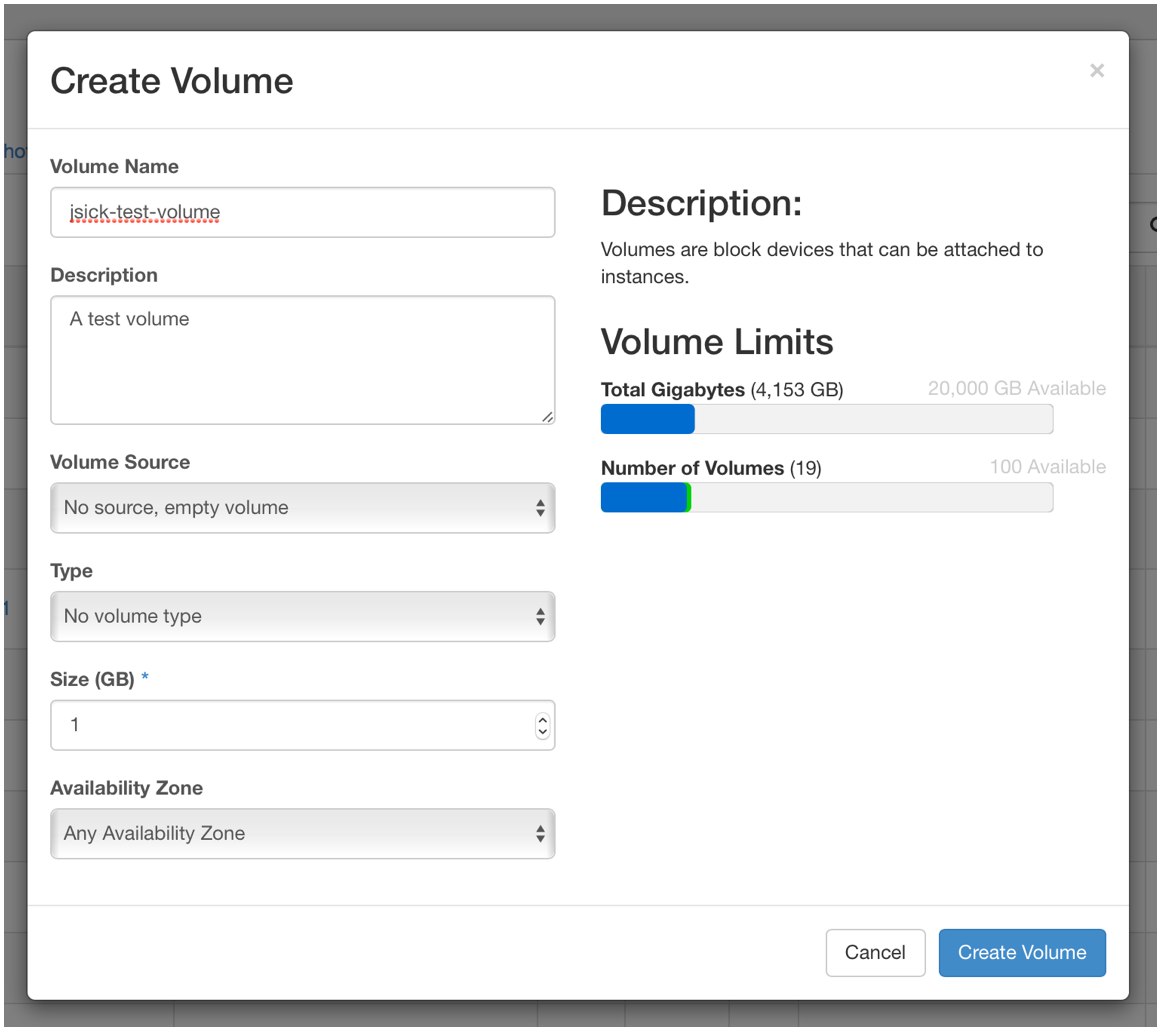
Step 2. Configure the volume.
Generally it’s a good idea to put your username in the Volume Name field so you know what’s yours. You’ll likely want to use an empty volume. And finally, choose a volume size.
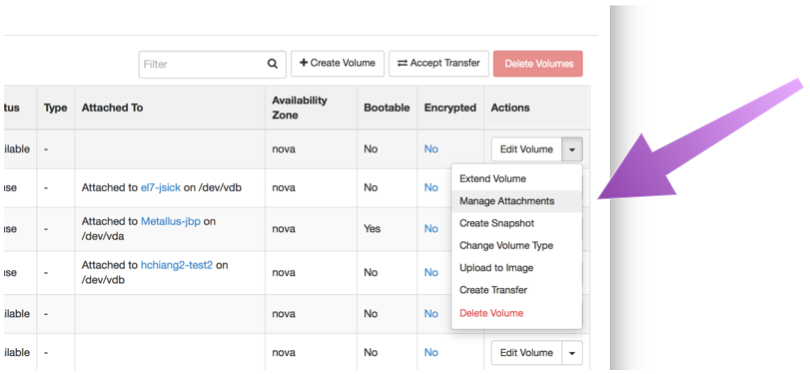
Step 3. Attach the volume.
On the Volumes dashboard page, find your Volume and click on Edit Volume and Manage Attachments.
In the panel that opens, select your instance and click Attach Volume.
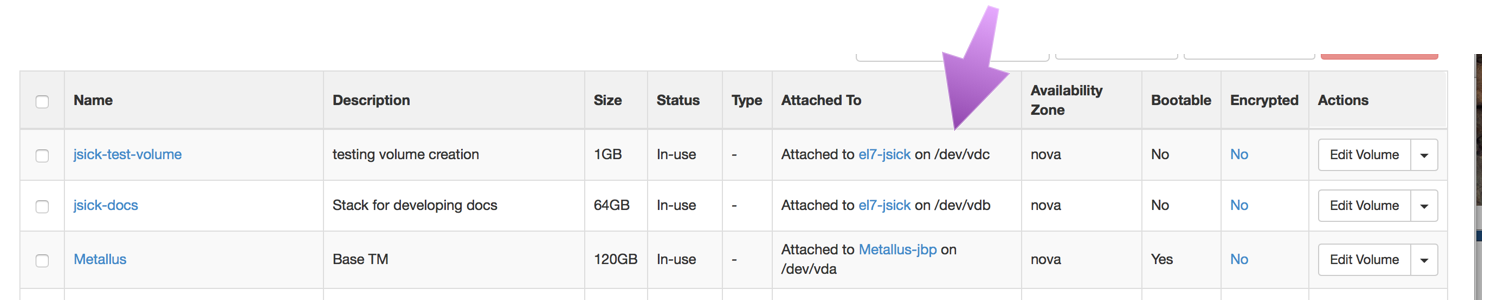
Take a note of where the volume is attached. Here the jsick-test-volume is attached to /dev/vdc
Step 4. Format the volume.
ssh into your instance, and format the volume:
sudo mkfs.ext4 /dev/vdc # update device name if it's not /dev/vdc
Only format the volume this one time!
Step 5. Mount the volume.
Choose or create a mount point
sudo mkdir -p /test
And mount the volume to that point
sudo mount /dev/vdc /test
(Again, change the device ( /dev/vdc) and mount point (/test) as necessary)
Finally, you’ll want to update the permissions
sudo chown -R `whoami`: /test
You can test that this worked by creating a file and seeing if it was written:
touch /test/test.txt
ls /test
Step 6. Unmounting the Volume.
sudo umount /test
To detach the volume, go to the Volumes tab on the Nebula dashboard, and click on Edit Volume and Manage Attachments for your volume. From there you can detach the volume from a running instance.
With the setup complete, you can now easily attach+mount the volume when you need it (and unmount+detach the volume when you don’t). Also, you can safely terminate an instance while a volume is attached; the volume will be automatically unmounted and detached.
Remember that the extra steps involved in formatting the drive and resetting permissions should only be done the first time a volume is created.